If you're like me, you might have been interested in making your own maps with tunnels and you tried it in the FinalSun/FinalTI editor and it doesn't work when you try playing the map. I've looked everywhere for full information on this matter and I can't seem to find it. After quite a bit of testing, I've figured out how it works. If you need help with tunnels, this is my gift to you.
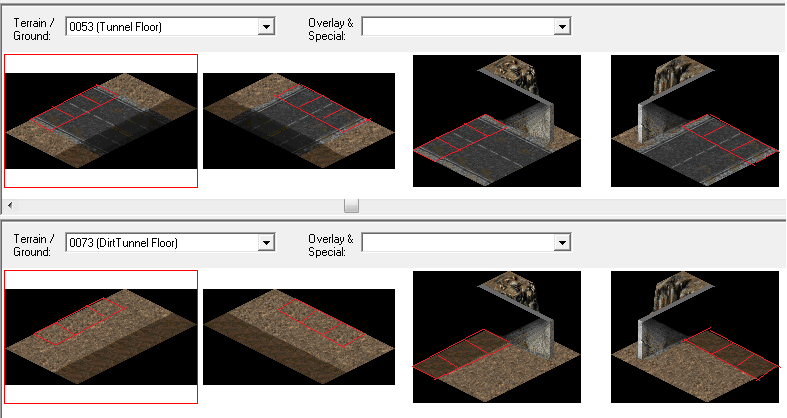
Firstly, don't use the editor's tunnel creator. Go to this page. (Credit to Q45 for this amazing tool)
Once there, you will be able to open the tool, it does come with its own instructions as well. Primarily, you need to find the coordinates of the middle tiles of the tunnel entrances. Don't worry about the other ones.
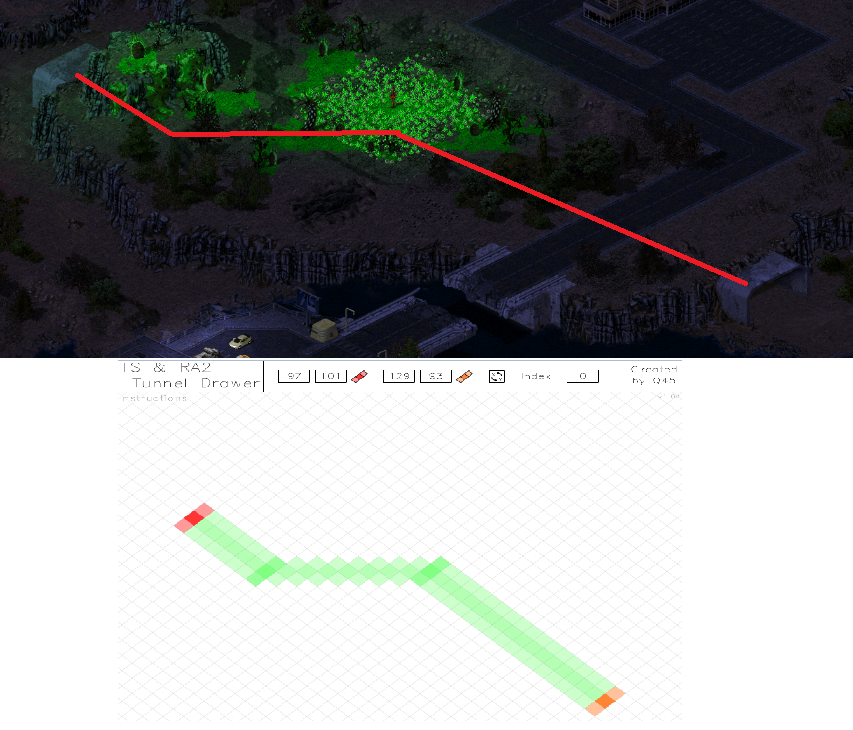
To make this much easier to identify, I'll show you the exact spots of the tunnel entrances. I've marked them just like how you should imagine them inside the tunnel tool linked earlier. Remember, you want the coordinates of the middle tile in the three marked tiles.
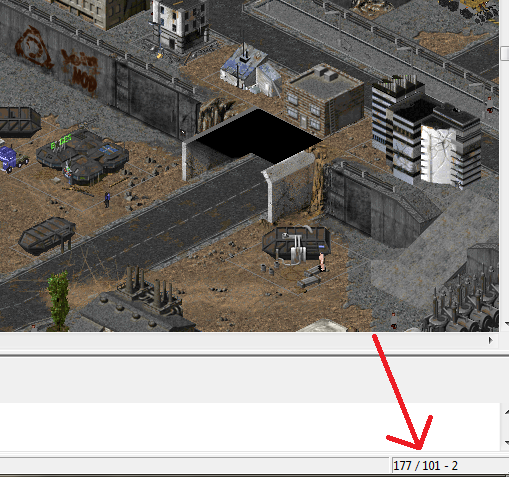
To find the coordinates, place your mouse over the "middle tile" of the tunnel and look here look here. Jot this number down in a notepad or just keep it in mind.
Now that you have the coordinates, place them into the tunnel tool above. Red or orange does not matter, just make sure the ends look appropriate. Note that the coordinates in FinalSun/FinalTI will be backwards. (For example, coordinates in Final sun will read 75/50, but the Tunnel Tool should read 50/75. There is an option in the tunnel tool to swap these numbers when clicked). Once the coordinates are entered into the Tunnel Tool, simply create your tunnel. Your tunnel may have turns and curves in it as well.
Once you have a nice tunnel created that fits your terrain, you will need to use the "Copy to Clipboard" option in the Tunnel Tool. Copy/paste this information into a notepad. It should look similar to this:
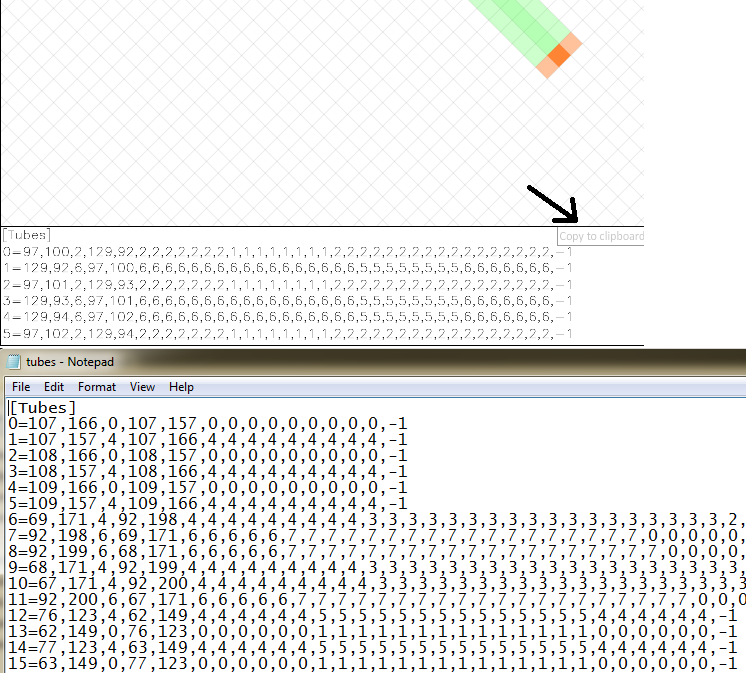
Each tunnel should create 6 lines of text, so if you want to make additional tunnels, use the "Index" function and add the lines to your text document. Note that the Tunnel Tool starts at 0, so you should be increasing in increments of 6 each time.

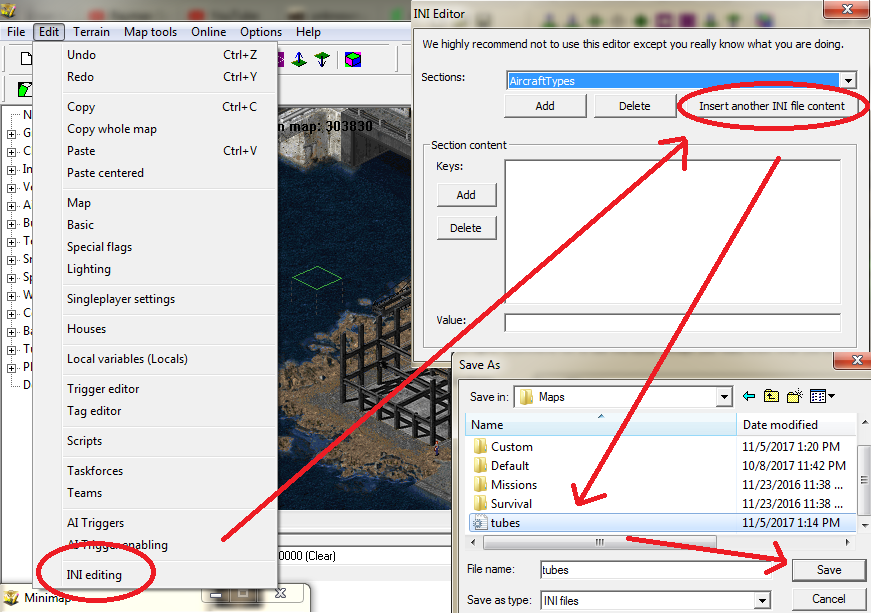
Once your notepad has every tunnel on it, you will need to add via Ini Editing. (Don't worry, you can add/remove/edit things in this notepad later) Save the notepad as "Tubes.ini" and place it where you remember it. Once done, go to INI Editing in FinalSun/FinalTI and import the .ini file.
Now that it is in your map, simply save it and try it out. As a suggestion, I recommend marking each of your tunnels in some way to help you find the specific 6 lines of text for a specific tunnel so you can easily edit it later. You can also check them by coordinates as well.
ADDITIONAL INFORMATION
I have not explained what the numbers in tunnel creator actually mean. I will try my best to explain in the simplest terms that I can. This should help to understand how the numbers work and can even be applied to other modding activities as well.
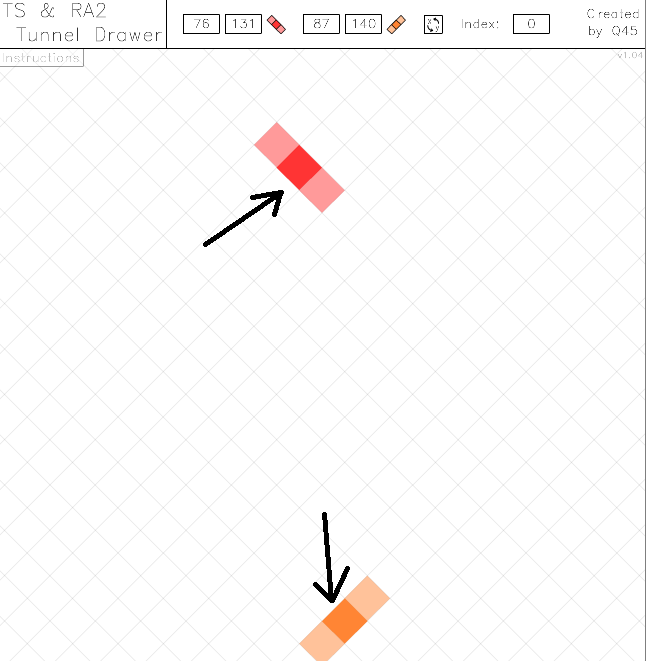
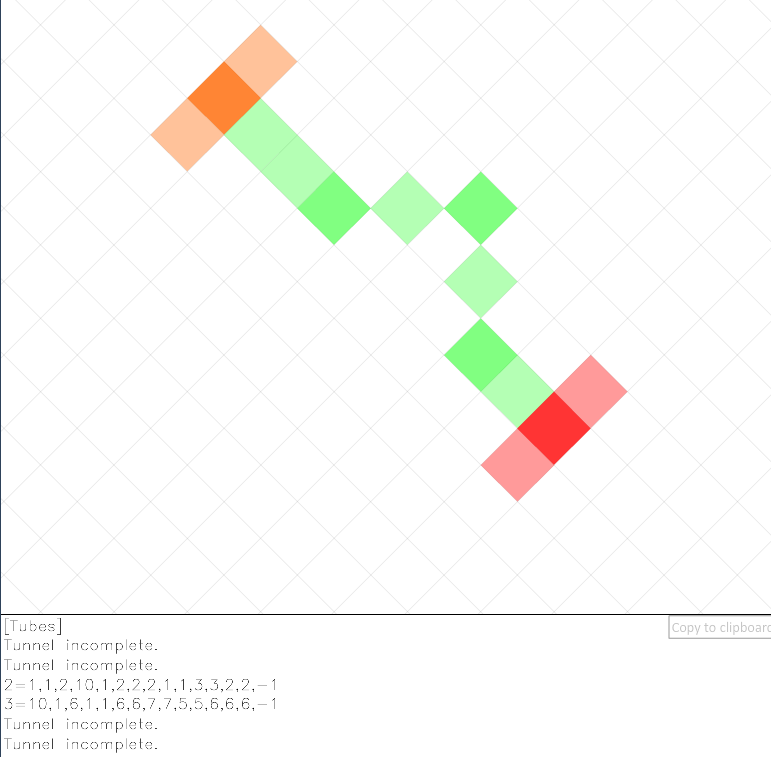
In the picture below, you can see a partially made tunnel. As you can see, its a relatively straight tunnel with a curve halfway through. The numbers below the tunnel maker are the code to insert into FinalSun.
For better viewing:
2=1,1,2,10,1,2,2,2,1,1,3,3,2,2,-1
3=10,1,6,1,1,6,6,7,7,5,5,6,6,6,-1
Each number has a different use.
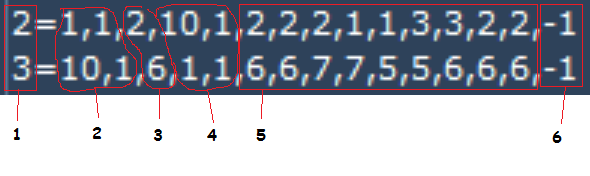
1: This one is simple. This is merely the number which marks the tunnel/tube. Since it usually starts are 0, the first tunnel is marked 0, the next is marked 1, etc...
2: These two numbers are the starting coordinates of the tunnel. This is the tile where the units ENTER the tunnel. In this example, I used coordinates 1,10 and 1,1. With different coordinates, this number will change wildly.
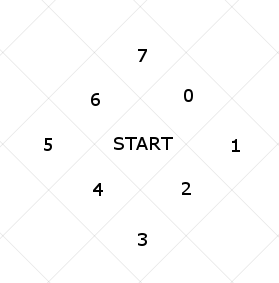
3: This number is the direction of the tunnel. From the entrance of the tunnel, this shows which direction the units will travel (so it looks smooth). To make more sense of this, see the "Direction Grid" further below.
4: These two numbers are the ending coordinates of the tunnel. This is where the units LEAVE the tunnel. As you can see, the two numbers mirror the next tube's starting coordinates.
5: This is the tube itself. Basically, each number is one "move". This also follows the direction grid below. In this instance, 2,2,2 means that it will move southeast, 3 times. 1,1 means that it will move east 2 times. 3,3 means it will move south 2 times. 2,2 means it will move southeast 2 more times. Look at these numbers and compare them to the image of the tunnel above.
6: I could be wrong on this one, but this is the "stop". Every tunnel I have seen has this -1 at the end of it, seeming to show there are no more moves to complete.
Direction Grid: